1. Getting Started #
Siteleads plugin allows you to create and configure an AI-powered assistant trained on your website content.
To begin setup:
- Navigate to the plugin dashboard.
- Click “Start with AI Assistant.”
If you are not authenticated, you will be prompted to sign in or create an account.
2. Account Authentication #
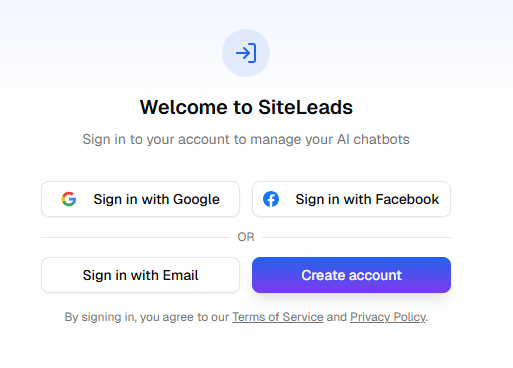
To use the AI Assistant, an active account is required.
2.1 Sign In #
If you already have an account, select one of the following options:
- Sign in with Email
- Sign in with Google
- Sign in with Facebook
Enter your credentials and proceed to the dashboard.
2.2 Create a New Account #
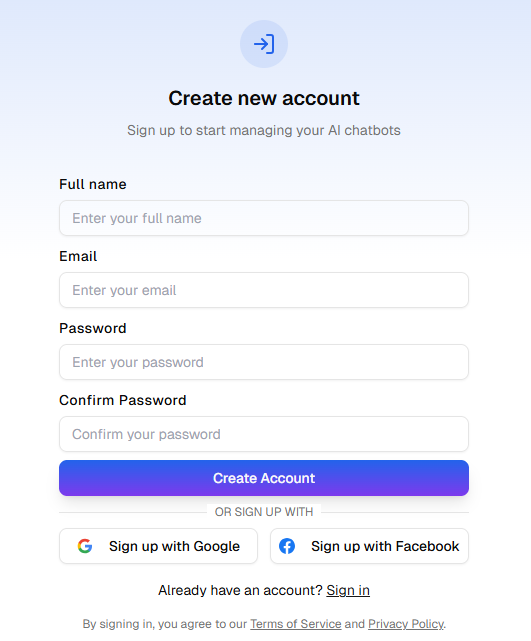
If you do not have an account:
- Click “Create Account.”
- Complete the registration form by providing:
- Full Name
- Email Address
- Password
- Confirm Password
- Click “Create Account” to complete registration.
Alternatively, you may register using:
Upon successful registration, you will be automatically redirected to the assistant configuration screen.
3. Configuring Your AI Assistant #
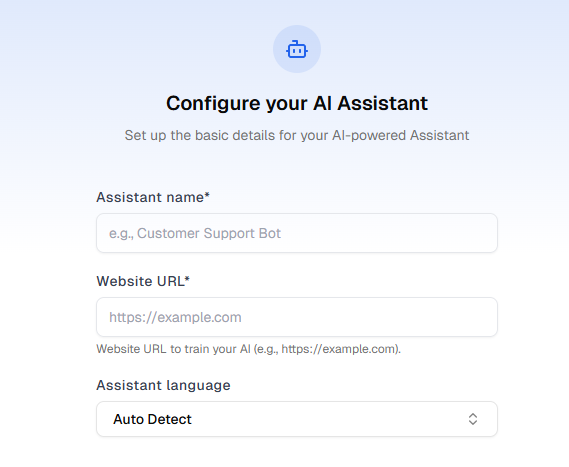
After authentication, the Configure Your AI Assistant screen will be displayed.
You must complete the following required fields:
3.1 Assistant Name #
Enter a unique name for your AI assistant (e.g., Customer Support Bot).
This name will be used internally to identify your assistant.
3.2 Website URL #
Provide the full website URL (including https://) that will be used to train the AI model.
Example:
https://example.com
The system will analyze and process content from this URL to generate responses.
3.3 Assistant Language #
Select the primary language for the assistant.
Available options:
- Auto Detect (Recommended)
- Manually selected language
4. Selecting Pages to Crawl #
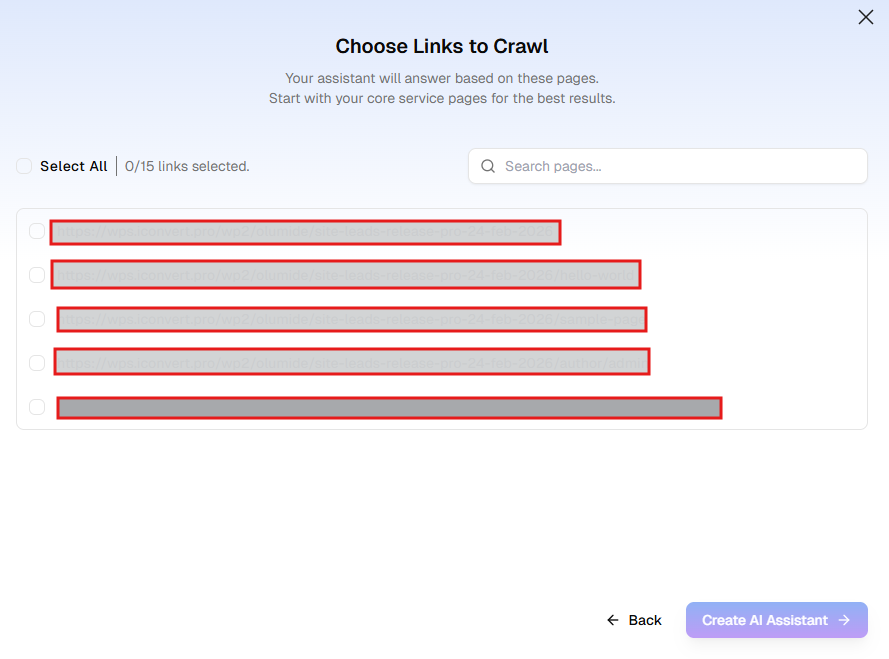
After completing the Configure Your AI Assistant form and clicking “Next,” you will be redirected to the Choose Links to Crawl screen.
This step allows you to select which website pages the AI Assistant will use for training.
4.1 Purpose #
The assistant will generate responses based on the content of the selected pages.
For best results, it is recommended to start with your core service or high-value content pages.
4.2 Selecting Pages #
You will see a list of available URLs detected from your website.
Options available:
- Select All – Select all listed pages at once.
- Individual checkboxes – Manually choose specific pages.
- Search bar – Quickly find specific pages by keyword.
- Selection counter – Displays the number of links selected (e.g., 0/15 links selected).
Select the pages you want the AI to learn from.
Note: It is recommended to exclude irrelevant pages such as admin pages, author archives, or uncategorized content unless necessary.
4.3 Creating the AI Assistant #
Once you have selected the desired pages:
- Click “Create AI Assistant.”
- The system will begin crawling and processing the selected content.
- The AI Assistant will then be initialized and prepared for use.
You may click “Back” if you need to adjust the previous configuration settings.
Additional Documentation #
For detailed, step-by-step instructions on setting up and customizing your assistant, please refer to the How to Configure an AI Agent guide.
This guide covers advanced configuration, training settings, and deployment options.